

I'll say it right now; don't buy this game if you aren't willing to put 122 miniatures together. Luckily I have a husband who has modeling experience, patience, and a steady hand. Of course he keeps telling me I need to put a few together myself. (We will see how that goes).
I'm planning on doing a three part review for this game. I'm going to start with the components break down for Part 1. Part 2 will be a rules review. I will definitely talk about the Commands and Colors version of the rules but I'm not sure about the Art of Tactics. I know and enjoy the Commands & Colors system but am not familiar with the Art of Tactics. I am impressed that the Art of Tactics comes with Basic, Intermediate, Advanced, and Expert Rules. Part 3 of the review will discuss my thoughts on the game. With three parts we will have time to assemble and play the game. So, thanks for reading and I hope you enjoy.

Components
The core game of Samurai Battles focuses on a number of battles from Japan's "Warring States Period" of about 1550-1600 AD. The expansions will focus on specific battles. Currently available mini-kit figure expansions add units to the game. There already more mini-expansions in the works.
There is a lot in this box and it is amazing that you can use these components to play two different games.
Game Boards
The game comes with 6 battlefield game board double sided tiles. One side of the map features a countryside setting with no other terrain features; the other side has river terrain hexes already painted on the battlefield.

For the Commands & Colors version of the game the map tiles are normally arranged to build a battlefield, 12 hexes wide by 11 hexes deep. The map tiles are arranged by the code in the corner, according to the specifics of each scenario. The half-hexes that are on the sides of the map and baseline of each army are not part of the Commands & Colors battle.
For the Art-of-Tactic version the battlefield changes according to the scenario. For example the tutorial scenario uses just two tiles, Scenario number 1 uses a square of six tiles, and scenario number five uses a rectangle of six tiles.
The board tiles are made of heavy card stock and seem to be good quality. They lay flat and haven't warped. When put together it is even hard to see the cut. In the Commands & Colors version you need to know where the line is between your right, center, and left flank so this could make it a bit difficult.

Terrain Tiles
There are 30 double-sided terrain tiles to represent the wide range of terrain features on the different battle fields. There are also 13 brown plastic hill tiles that are used. Each of the terrain tiles influence the battle in different ways. Some give a bonus or block line of sight.

These terrain tiles are also nice quality and the plastic hills fit together well. They also look nice on the board.
Those familiar with Memoir '44 of BattleLore will find the terrain restrictions, bonus, and line of sight rules very similar. It isn't a big deal but I think green hill tiles wood look better than the brown tiles.
Command Cards
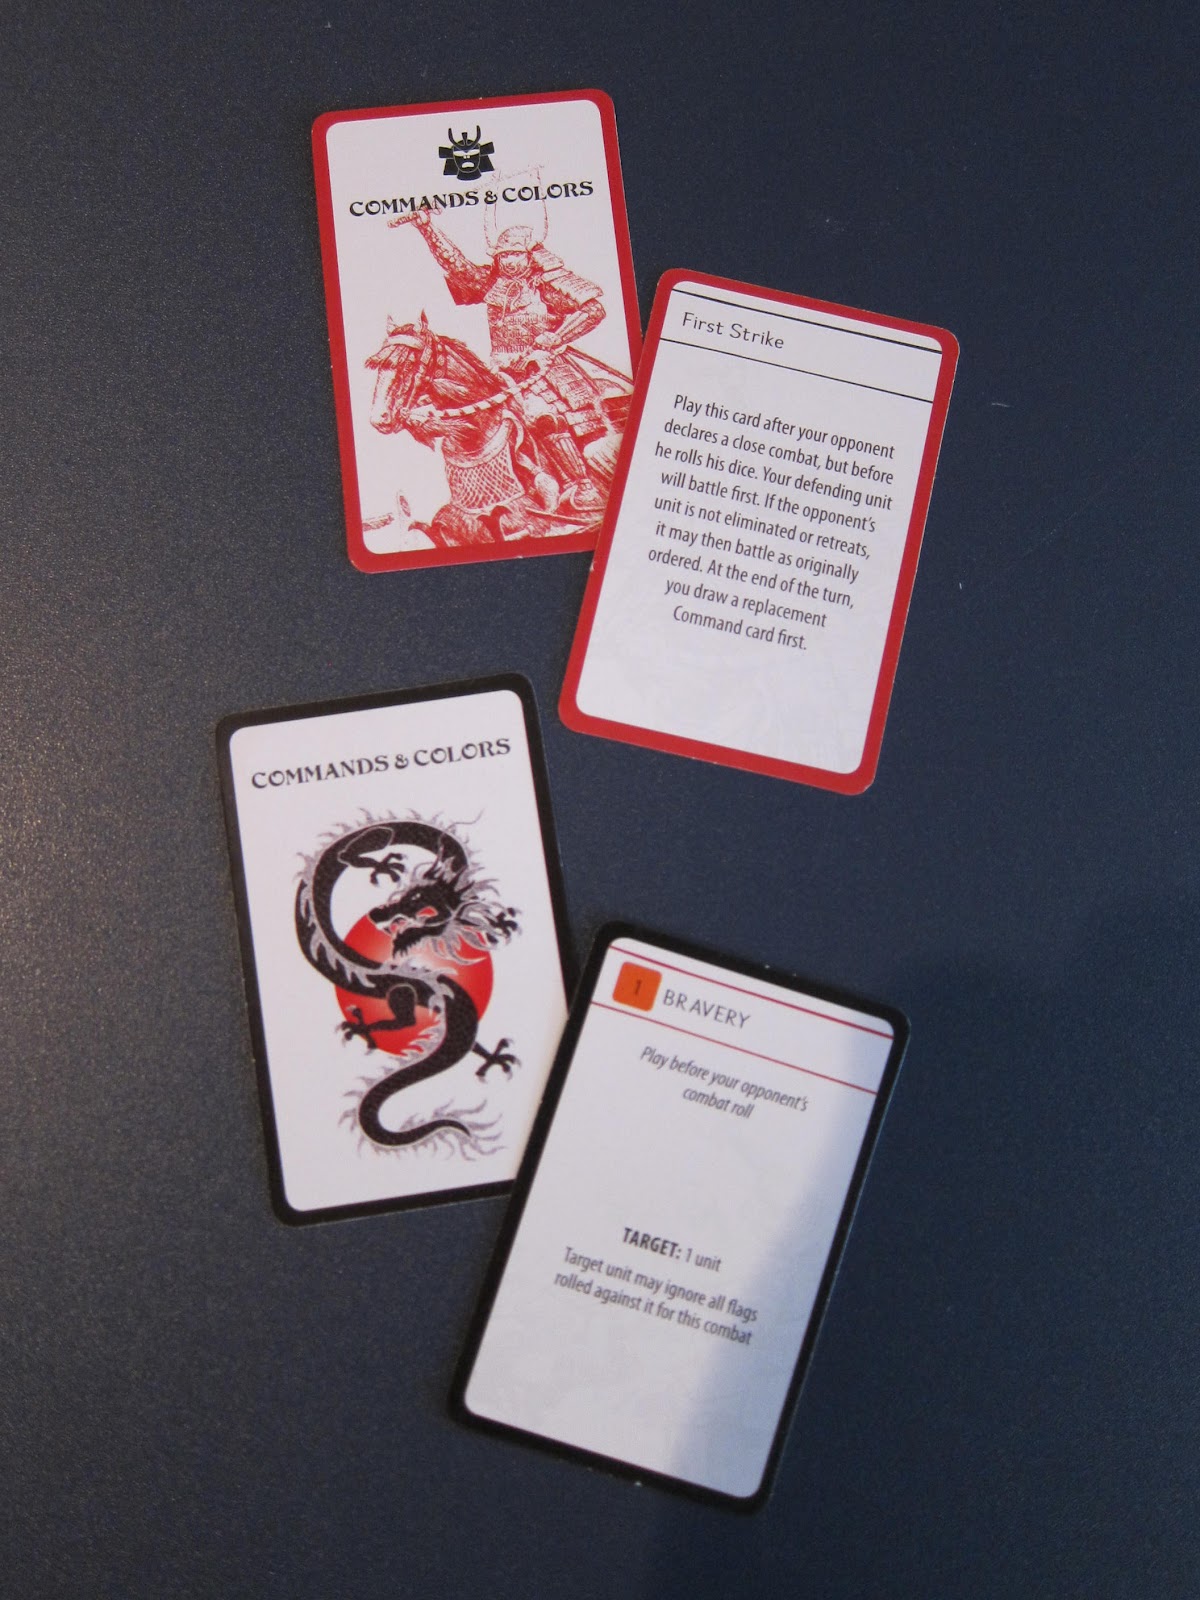 Command Cards are the essential to the game. Units can only move or battle when given an order and allow troops to move, battle or do a special action. The game includes 60 Command Cards. The front of the command cards show a picture of a mounted samurai and has a Samurai helmet symbol on the front. The cards are either section or tactics cards.
 There are 39 section cards that are used to order units/ and or leaders in a specific section of the battlefield or move and /or battle. They indicate the section of the battlefield that they may order units or leaders and how many units or leaders may be ordered. All Section Command Cards have a Samurai helmet symbol on the card to remind the players that any leader in the section with a unit may be ordered to detach and move separately (for one order).
Some examples of the section cards are the Tiger Tail Left that lets you issue an order to 2 units and /or leaders in the center section and 1 unit or leader in the left section; or the Crane's Wing that lets you issue an order to 1 unit or leader in each section.
There are also 21 Tactic Cards. Tactic cards allow ordered units to move and /or battle in ways not normally allowed in the basic rules. Terrain movement and battle restrictions still apply when a Tactic card actions contradicts the basic rules.
One example of the Tactics Cards is the card First Strike. This card allows you to play it after your opponent declares a close combat, but before they roll the dice. Your defending unit will battle first. If the opponent's unit is not eliminated or forced to retreat, it may then battle as originally ordered. At the end of the turn you may draw a replacement Command Card first. Another card named Shogun allows you, for each command card you have including it, to roll 1 die. For each unit standard symbol rolled, one unit with this symbol on its standard is ordered. One unit or a leader of your choice is ordered for each flag symbol rolled. Units may be ordered in any section. 1 honor & fortune token is collect for each honor symbol rolled. Ordered units battle with 1 additional die the entire turn. Then the Command Card deck and discard pile is reshuffled. The Dragon Card deck is also reshuffled.
These cards are not the best quality cards. I really like the artwork on the cards but not the thinness. We will be putting these cards into sleeves. This is coming from a family who hates to have cards sleeved. They are pretty thin and since they will be used we will want to protect them. Also, unlike Memoir '44 the game didn't come with card holders to my disappointment. But we will use the ones from that game.

Dragon Cards
There are also 38 Dragon cards. They are also in need to sleeves as well. These cards represent the powerful, mythical, and sometimes unexplainable abilities. They may be used to hinder your opponent's army, enhance your own abilities, or even instantly change the course of the battle. These cards, along with the honor and fortune tokens can be very precious during the game. There is no limit to how many Dragon cards a player may have.
Each Dragon card shows the following information: tile, cost, phase of play, target, and effect. The title is the name of the dragon card. Cost refers to how many honor and fortune tokens a player must pay to use the card. The idea is that the honor fuels the action and special power of the cards. Some do have a zero cost. Phase of play refers to when during a game turn the card may be used. For example you may play it before your close combat roll, alongside your command card, or before your battling back combat roll. Target is the text detailing the target, subject, beneficiary, or area of effect of the card. And the effect gives you a description of the card and the special rules governing it.
You may only play one Dragon card on your turn and one on your opponent's turn. So during a single game there may be two Dragon cards coming into play for each player. In case there is a contradiction between the effects of two Dragon cards played in succession, the second card trumps the effect of the first one.
Samurai Victory Records Cards
There are two of these cards. When the last figure of an enemy unit with its unit's standard or a leader with its standard is eliminated, it is placed on the Record Card to track victory.
Dice

Each die has a red square symbol, blue triangle symbol, green circle symbol, sword symbol, yellow retreat flag symbol, and a purple honor symbol.
For the Art-of-Tactic there are also 6 white 20 sided dice. These are okay but we already replaced them with some nicer dice.
Honor & Fortune Tokens
30 Honor and Fortune tokens are used as a measurement of the staying power of a player's army and also act as the currency for the Dragon cards. One side of the token is purple and shows a white asterisk symbol. The other side is black and has a red Samurai helmet, white Samurai helmet, blue triangle, green circle, or red square. These may be drawn randomly before playing to add reinforcements, create a random scenario, or for possible expansions, according to Richard Borg.

Medieval Japanese Plastic Figures
There are 122 plastic figures included in the game. Each figure will need to be assembled before play. They come separated and wrapped in plastic. I would recommend opening one package at a time and assembling them one at a time. You will want to have a nice sharp XACTO-knife, miniature clippers, and if you wish a good cutting surface. It is noted that you will not need glue. The figures do snap together without glue but my husband found, with the few he has put together, it was good to put a little dab of plastic glue in some places. It isn't necessary but it assures the pieces stay together. He also suggests working on completing all of the same unit before going on to a new one. This way you get to know how to put it together, where it needs to be glued, and so forth.

The advantage of putting the figures together is that you get amazingly detailed miniatures. They really are beautiful. And, according to the ones that I saw at Origins they look beautiful painted. I wish I was that talented but I will probably never paint these. I'm sure anyone who does will have not only a fun game but a work of art as well. The movement tray that come with the units are not in the Commands & Colors system but they are used in the Art-of-Tactic system.
The units also come with two colors, red a yellow, of Sashimono flags for each army. These flags go into the units nicely but I'm a little leery of taking them back out of the unit.

One figure of each unit must have standard inserted into the figure's base. The unit's standard-bearer is a key element in the game and it also offers visual clues as to the nature of the unit he leads into combat. A standard's symbol (circle, triangle, square, or helmet) defines the unit's combat strength and rank. The standard-bearer also is the last figure of a unit to be removed from the battlefield when a unit is defeated. A leader figure's standard has a Samurai helmet. Be careful with these standards and be sure to insert them by the base only.
The 122 figures include 8 Ashigaru spearmen, 4 Ashigaru bowmen, 2 Ashigaru arquebusiers,2 Samurai headquarters, 4 Samurai naginata infantry, 4 Samurai cavalry, and 4 Individual commander figures to add to a unit.
Infantry Units

Ashigaru Infantry Spearmen- There are four figures in this unit. The standard symbol of the spearmen is a triangle. They can move up to 1 hex and battle, or two hexes and not battle. During close combat they use three dice. If they retreat you lose one Honor & Fortune token for each hex they must retreat.
Ashigaru Infantry Bowmen - There are four figures in this unit. The standard symbol of the bowmen is a circle. They may move up to 2 hexes and battle. In close combat they use two dice. In ranged combat they use 2 dice. They have a range of three hexes: (adjacent no fire dice), (two hexes to target 2 dice), (three hexes to target, 2 dice). When an Ashigaru infantry bow unit moves and engages in ranged combat, the number of battle dice rolled is reduced to 1 die. If they retreat they lose one Honor & Fortune token for each hex the unit retreats.
Ashigaru Infantry Arquebus - There are four figures in this unit. The standard symbol of the Arquebus is a circle. They may move up to two hexes and battle. In close combat they use two dice. In ranged combat they use two dice. As Ashigaru Arquebus has a range of 4 hexes: (adjacent, no fire dice), (two hexes to target - 2 dice), (three hexes to target 2 dice) and (four hexes to the target - 1 dice). If they retreat they lose one Honor & Fortune token for each hex the unit retreats.
Samurai Infantry Naginata - There are four figures in this unit. The standard symbol of the Naginata is a square. They may move up to one hex and battle. They use four dice in close combat. Because of Moral they may ignore one flag. If they retreat they lose two Honor & Fortune token for each hex the unit retreats.

Infantry Leader - There is only one figure in this unit. The standard symbol of the leader is a Samurai helmet. They may move up to 2 hexes. In Close Combat a leader may not battle. Instead an infantry leader may inspire a unit in his hex by spending one Honor & Fortune token to give the unit one additional die in close combat. Because of Moral a unit with a leader may ignore 1 flag. If they retreat they lose 3 Honor & Fortune tokens and may retreat 1, 2, or three hexes. A unit with a leader will lose 1 additional token for each hex the unit retreats. The leader that is alone may also commit Seppuku instead of retreating.
Calvary Units
There are also Samurai Cavalry Yari and Calvary leaders. Calvary units have four figures, one figure with a unit standard and three other figures.
Samurai Cavalry Yari - There are four figures in this unit. They may move up to 2 hexes and battle. Their standard symbol is a square. They use four dice in close combat. Because of Moral they may ignore 1 flag. If they retreat they lose 2 Honor & Fortune tokens for each hex the unit retreats.

Calvary Leader - There are 1 figure in this unit. They may move up to 3 hexes. Their standard symbol is a Samurai helmet. In Close Combat a leader may not battle. A cavalry leader may inspire a unit in his hex and any units in adjacent hexes by spending one Honor & Fortune token to give the unit one additional die in close combat. A unit with a leader may also ignore 1 flag because of Moral. If they retreat they lose 3 Honor & Fortune tokens and may retreat 1, 2, or three hexes. A unit with a leader will lose 1 additional token for each hex the unit retreats. The leader that is alone may also commit Seppuku instead of retreating.
Commander's Unit
The Commander's unit is a special type of unit. The unit is made up of a commander (leader) figure with a standard, three bodyguard figures, and a command ten terrain tile. Their standard symbol is a Samurai helmet. This unit may not move. During close combat a commander figure may not battle. However, the commanders unit can battle with 1 die for each bodyguard in the unit. A commander may inspire his bodyguards by spending one Honor token to five the bodyguard one additional die in close combat. Bodyguards in close combat re-roll all swords for additional results. Bodyguards are only hit by rolling a sword. A casualty check on the commander figure is required when one or more bodyguard figures are eliminated.
A Commander's unit with its commander may ignore one flag because of moral. A commander's unit does not retreat: if the Commander's unit must retreat, it will lose one bodyguard figure for each flag a Commander's unit cannot ignore. Once all the bodyguard figures are eliminated the commander must retreat. On the retreat he loses 3 Honor tokens and may retreat 1, 2 or 3 hexes. A commander figure, when not on his command tent, is treated as a leader. The commander may commit Seppuku instead of retreating.
Art-of-Tactics Components
For the Art-of-Tactics system the units also come with Unit Cards and Matching Unit flags. The Unit Cards are wipe-off cards and can be marked with dry erase markers. These cards show the units abilities and the orders that may be assigned to that unit. The movement bases are also used for the Art-of-Tactics system. The Unit flags show the unit type, type of armament, and experience level (recruit, experienced, or veteran). You mark the flag and unit card with the same number so they are easily identifiable. Be careful to check which markers come with your game. Ours came with permanent markers but they gave us some dry erase markers to replace them. I don't know what the other games will come in the future.

Rules / Scenario Books
Each system also comes with its own rules and scenario books. The Commands & Colors system comes with two core game unit summary sheets. I see these getting used a lot during the games, especially the first few games so they will probably be laminated. The Art-of-Tactics also comes with a player aid they will probably need to be laminated as well if we play that version of the game.

My Thoughts on the Components
Aside from the cards the components are of a high quality. I see a future with many postings of these painted and lined up on the battlefield. I am glad that I am not the one putting them together but it can prove to be an enjoyable experience for anyone who enjoys modeling. It will take time and patience but I think it will be well worth the effort.

I am very excited about playing this game soon. Overall it looks and feels like a collaboration of Commands & Colors / Memoir '44 / BattleLore so I feel comfortable that I will learn and enjoy this beautiful game.
Photo Credits: Pictures not taken by my husband were taken by: W. Eric Martin (W Eric Martin), Steven E Smooth Sailing... (StevenE), Benjamin Symons (SammySnijbonen),Benjamin Symons (SammySnijbonen)
Special thanks to my husband for putting this together and for taking a lot of pictures for my review.
Quick Stats:
Artist:
Players: 2
Publishers: Zvezda
Time: 60 Min
Ages: 10 and up
No comments:
Post a Comment