Monday, May 28, 2012

Coming Soon: The Battle of Red Cliffs


A few months ago I wrote of review of Tien Zi Que.  It is one of my favorite card games and I was honored when the designer commented on my review.  Then, to my further amazement he asked me to play test a game he had been designing in the same line of Tien Zi Que and his game the Battle of Red Cliffs.

Of course I took him up on the offer and soon had the prototype for Red Cliffs in my hands.  With the help of friends and family we played the game and tried to offer our best praise and criticism (though there wasn't much of this).  It has been amazing to be a part of this process and I am excited about seeing this game published.


Goal of the Game:

Battle of Red Cliffs is a card variant of mahjong. Like Mahjong, each game of Red Cliffs takes several rounds of play.

What is unique about the Battle of Red Cliffs is that during the round, players collect sets of cards and keep one card from each set.  These are used for end of round scoring. When one player has five or six score cards, the round continues until the last player finishes his/her turn. Each player adds victory points to the score board based on the combinations of the score cards.  Play then continues to the next round. The game ends when one player, or a team, reaches a certain Rank level.  The player, or the team, with highest score wins the game.
Components:

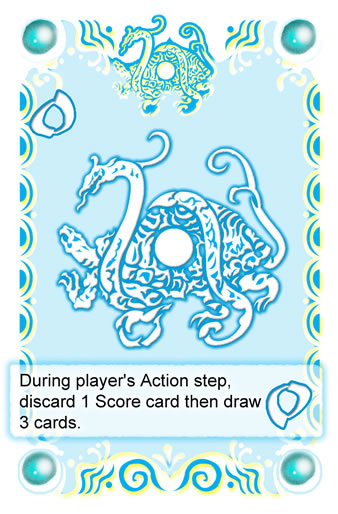
Because I am play testing this game I can't comment on exactly what the final version will look or feel like.  I am excited because I like the anime and Asian style of the artwork.  Fans of he older version of The Battle of Red Cliffs will recognize the artwork as being very similar is design.  There are a lot of cards (117), a score board and more coming with this game.

 
Number Cards
- Zero- 16 total (4 Red, 4 Blue, 4 Green, and 4 White)
- Numbers 1 to 9 -  63 total  (18 Red, 18 Blue, 18 Green, and 9 White)
Special Cards    

- Beauties -  28 total (8 Red, 8 Blue, 8 Green, and 4 White)  The beauties are called warrior, dancer, maiden, and damsel.

 - TZQ - 9 total (These are the black cards)

- Event - 1

There are also 9 Command cards that give players special abilities, 9 player aides, one score board, and 7 score tokens.

Game Setup:

Players must first choose which game type they are playing: man on man or teams.
  • Man on Man for 2 to 7 players
  • Teams of Two for  4, 6 or 8 players. (Team members must sit at least one or more seats away from one another.)
  • Teams of Three for 6 or 9 players. (Team members must sit two seats away from one another)
Next, players must place the score tokens on the Score Board accordingly.  

For Man on Man each player chooses a color and places the token on the "Level 1" space of the score board.  For teams of two each team chooses a color (red, blue, green or white) and places it on the "Level 1" space of the game board.  Or, for teams of three each team chooses a color (red, blue or green) and places the score token on the Level 1 space of the scoreboard.  The remaining tokens are placed back in the box.


Now, each player randomly takes one Command Card and one the Player Aide card for his/ her team color.  The remaining cards are removed from the game. The youngest player will be the Starting Player.

Round Setup:

For the first round of a new game, each player takes one TZQ card into his/her hand and then shuffles all remaining cards face down to form a Draw Pile. Make sure to leave extra space for three discard piles next to the draw pile. For all other rounds, each player takes one TZQ card from the Trash Pile into his/her hand.  Remember, you DO NOT shuffle cards to form a draw pile at the end of a round.
 

Now each player draws five additional cards from the draw pile into his / her hand. If an event card is drawn, draw another card.  Then, shuffle the event card back into the draw pile.  When this draw pile is depleted at any time during the game, shuffle the Trash Pile face down to form a new draw pile.  Players do not reveal their hand cards to other players, including team members.

Game Play:

The round begins with the starting player, and each player takes a turn proceeding clockwise.  During each turn, the active player takes four steps in specific order.  These steps are:
  1. Peng!
  2. Draw
  3. Actions
  4. Refill
Step 1: Peng!

Peng! is an interpretive action.  Players take two hand cards an a top card from Discard Piles B or C to create a Trips Set.  After creating the trips set, the interrupt players chooses one cards as a score card and places the two other cards in the trash pile accordingly.  The active player then continues with his are her turn.

The interpretive player may not refill their hand cards until the Refill step on their turn.  But there is no limitation of Peng! actions hat player may make per round.  Sometimes more than one player may be able to take a Peng! action. Priority goes first to the active player.  After this the player who sits closest to the active player has the priority. 

Step 2: Draw

The active player now draws one card from the draw pile and takes it into their hand.

Step 3: Actions

The active player may create 1 or 2 sets and play at least on action card.  This may be done in any order.  For example, the player may play an action card, create a set, and then play another action card.  If the active player does not create a set or play an action card they may discard 1 or 2 hand cards.

Creating a Set:  A set contains three cards.  These cards by be a straight or a trips set.  A Straight Set is three consecutive numbers.  For example 1, 2, 3 or 7, 8, 9.  1 and 9 are NOT connected and cannot be used to create a straight set.  Three different Beauties may also be used to create a set. When creating a set with three Beauties the players may choose to take one set action from one Beauty.  If they use a TZQ and two Beauties they may still only take the action from one Beauty.


A Trips Set is a set of three cards of the same card.  For example three ones or three beauties.  After creating a beauties set, the player may, if they wish, take the (Set) action on the card.

Sets may be created from the players hand or by taking two cards from the players hand an a top card in either discard pile B or C.  Color is irrelevant when creating a set. A great feature of Red Cliffs are all the special cards.  The Zero card is a numerical wild card that can be used when creating a straight set.  For example, using 0 as a number 3 to create a straight of 2, 0, and 4.  Three zeros can also be used to create a trips set.  

The TZQ card is a super wild card, and it can be used as any of the beauties or any number including 0.  But, a player cannot create a trips set with three TZQ cards.

After creating a set, the player chooses one card as a score card and places it in their play area.  The other cards are discarded.  There are a few rules when discarding.  TZQ cards and 0 cards are always discarded to the A pile.  Remember, players may not take cards from the A pile to Peng! or create sets.  If both cards are not wild cards, players may place them in pile B or C in any order of one in pile B and the other in pile C.  If either pile B or C are empty the player must discard to the empty pile first.  Players may look through the discard piles at any time during the game.

Playing an Action Card:  An action card is also the number 0 card.  When playing an action card, follow the description on the card.  When a player finishes, discard the action card in discard pile A. 

Step 4 - Refill

Now the player draws cards form the top of the draw pile until they have six cards in their hand.

Event Card

When a player draws and even card during the turn, first redraw another card, and then resolve the description on the event card.  When finished, place the event card in the trash pile.  

When the active player finishes their turn, the player to the left continues with a new turn.  

If the active player has five or six score cards at the end of the turn, the round continues until the last player or the player sitting to the right of the starting player finishes his or her turn.  When the round ends, follow the instructions in the End of Round and Scoring.  

End of Round and Scoring 


When the round ends all players put their hand cards and all the cards in the discard piles into the trash pile.  Trash pile cards are kept facing up, and no one can look through the pile during the game.

Each player uses the Player Aid / Score Card as a reference and then based on their score cards, accumulates victory points (VP) from the following sections.

  1. 2 or more cards of the same numbers
  2. 2 or more cards of the same Beauty
  3. 2 or more Beauty cards
  4. 3 or more cards in Red
  5. 3 or more cards in Blue
  6. 3 or more cards in Green
  7. 3 or more cards in White
  8. 3 or more cards in Black
  9. 4 or more cards in different colors
  10. 4 o more cards in a straight
There are no wild cards in scoring.  Number 0 is a ZERO with a color.  TZQ is simply a black color.

After calculating the victory points, each player adjusts their score token accordingly.


For example if a player has 2 blue sevens, 1 green six, 1 red 8, and one blue 9 they would receive 10 points.  They would get 2 victory points for having 2 or more cards of the same number (7s), 2 victory points for having 3 or more cards in blue (7s, 9), and 6 victory points for having 4 or more cards in a straight (6,7,8,9).

In a team play game, a team's victory points are a collective of its members.  For example, in the beginning of the round, Team A has 6 points.  At the end of the round, Mike from Team A receives 4 points, and Kristen from Team A receives 8 points.  The team would then score 12 points (4+8) total in this round.   With the six points from previous rounds, Team A now has a total of 18 points.

If any one player or team's token reaches the End of Game Conditions, the game ends immediately.  Other wise:

  1. Move all score cards to the trash pile
  2. The player who sits on the left of the starting player becomes the new starting player for the next round
  3. If the score token is not on a ranking level, (first number on that row) move the score token to the next lower level.  For example 
    1. If the score token is on "4," then more the token to "3," of the second level.  
    2. If the score token is on "10," then do not move the token
  4. Follow the Round Setup to begin a new round
End of Game Conditions:

- Man on Man:  When one player reaches 20 points or higher
        - Optional Rule:  For a 2 or 3 player game, when on player reaches 30 or higher
- Teams of Two:  When a team reaches 30 points or higher
- Teams of Three: When a team reaches 50 points or higher

Game End


When the game ends, the player or team with the highest score wins the game.  In case of a tie, the one who scores the most points in the last round wins.  If there is still a tie, the last player or team belonging to the last player of the last round wins.


My Thoughts

I already said that I really enjoyed Tien Zi Que but it just may be surpassed by Red Cliffs.  Red Cliffs feels like a grown-up version of Tien Zi Que.  There are more options on your turn, a deeper strategy, the special abilities of the Command Cards.  It is also able to support up to 9 players now! The fun, push your luck element I so enjoyed from its predecessor is still there.  It is also easy to learn and quick to play.  I'm sure I'll end up with multiple copies of this games to go along with Tien Zi Que collection.

During your turn you have the option to play one or more sets and play an action card.  Tien Zi Que limits you to creating only one set, so even if you have two sets you could create you couldn't.  With Red Cliffs you can Peng!, and create two more sets on your turn if you play your cards right.  It is a lot of fun when you are able to complete that move.

When I first started playing I wasn't sure that I would like the two different wild cards, the Zero and the TZQ.  Won't that make it to easy too make sets I thought?  But instead it actually adds a lot more strategy to the game.  Each round you get a TZQ card but it must be used wisely.  Use it to early and you may end up wishing you add it later on in the round.  Hold on to it for the perfect combination and it may just sit in your hand the entire round.

Zero also being wild for just numbers adds another layer as well.  If you have a lot of Beauties and want to go for that score a zero may not prove very useful.  Plus, you may want to use the Zero for its action rather than as a wild card.  Both the wild cards go into Discard Pile A and therefore can't be used to Peng! or make a set from the discard piles.


This brings me to the strategy of using the discard piles.  You wouldn't think that where you discard a card would matter but it does in Red Cliffs.  Choose the wrong card to place on top and you just may give your opponent a chance to create a set.  Of by placing strategically you may be able to use the same card over again to create a second set or to Peng! during the next round.  It really does take some thought even when discarding. 

I also love games that give players different special abilities so I was very excited about the Command Cards.  The Command Cards are just fun.  I like breaking the rules sometimes in games and being able to do something other players cannot.  It's fun to say with my Command Card I'm drawing back up to my hand limit after I Peng!.

I am very excited about seeing this game on Kickstarter soon.  It has been a privilege to see this project thus far and I can't wait to see the final version.  The Battle of Red Cliffs will be on Kickstarter toward the end of June so please support this great game by a wonderful designer. 

Quick Stats

Publisher:  Look for it soon on Kickstarter!
Designer: Ta-Te Wu
Artist: Ta-Te Wu
Players: 2-9
Time: 30 Min
Age: 10+
Mechanics: Partnerships, Set Collection

Photo Credits:  Ta-Te Wu, Johnny L (Sabruquitas)


Tuesday, May 8, 2012

Flash Point Fire Resue

Fire fighters, brave men and women who rush in, when others run away.  Children dream of becoming one as they see the shiny fire trucks zoom down the road.  I admire their courage, their daring, and their tenacity.  They truly deserve the title of hero.


This is why Flash Point is such a compelling game.  The theme is amazing; saving victims from a burning building, who can't get behind this one?  It's a co-op, so we win or lose together.  And even if you don't win, you usually rescue a few victims.  And, for a few of us, we get to live out that childhood dream of being a fire fighter.


Object of the Game:


In Flash Point players are trying to rescue victims trapped inside of a burning building before the fire gets out of control or the building collapses.

Players win or lose as a team. Players win when seven victims are rescued or they lose when the four victims are killed or the building collapses. 

Components / Set Up

The game board is double-sided.  Each side shows a different building.  The board reminds me a lot of houses from the computer games SIMS, and truthfully the way fire are randomly starting in the game it makes me wonder if the victims are Sims.  This doesn't mean I don't like the artwork.  It's very good! The Building is divided into rooms and the area outside consists of spaces with numbers, die faces, and four corner spaces.  These outside spaces are used during the game.

The board is a grid and each space has a coordinate.  These grid coordinates are marked in the lower right of each space with easy to identify symbols.  The symbols show the grid location of the space and correspond to the dice. Players will be rolling dice many times during the game to determine where to add markers (fire/smoke tokens or points of interest).  The red symbol represents the red, six sided die.  The black symbol represents the black, eight sided die.  Together these symbols mark a board location.

An important point to remember is that, when referring to adjacent spaces, these spaces are up, down, left, or right from a space.  Diagonal spaces are not adjacent.  Closed doors and walls prevent spaces from being adjacent - unless the wall segment is destroyed.  A wall segment with one damage marker is damaged; two damage markers mean it is destroyed.


After players choose which board side to play with they should place the door markers with the closed side up in each of the door ways.  The door markers are thick circular cardboard disks that are double-sided.  One side shows a closed door the other an open door.  All the components are very nice and of high quality. 


The game also comes with six fire fighter pawns.  If you were lucky enough to be a Kick Starter supporter you would have gotten the awesome fireperson meeples.  But alas for me, I passed and didn't get these neat little guys.

Other components included are 33 double-sided threat tokens, one side showing fire, the other smoke.  The 18 point of interest tokens that have a question mark on one side.  On the flip side they are either a false alarm blank or a victim.  24 black wooden damage counters, 24 hot spots, 21 action markers, 3 heal markers, 6 hazmat markers, doubled sided ambulance and engine markers, and six player cards.


The game also comes with player aid cards for each player and eight specialist cards. 

If playing the advanced rules players will need to choose a difficulty level.  The game comes with a family game set-up but I won't go over those rules in this review.  For a Recruit level players will place 3 initial explosions and 3 hazmats, at Veteran level there are 3 initial explosions, and 4 hazmats, and at heroic level there are 4 initial explosions and 5 hazmats.  All unused hazmats are placed back in the box.

Now players must set up the board.  To set the first explosion one player rolls the back eight sided die to determine the Target space as follows:  1= Red three, black three, 2= Red three, black four, 3= red three, black six, 4=red three, black six, 5= red four, black six, 6= red four, black five, 7= red four, black four, and 8= red four, black three.  Players place a fire and Hot Spot marker and resolve and Explosion in the Target space.


An explosion radiates in all four directions (up, down, left, right) from the target space.  Place a fire marker with the fire side up in each adjacent space.  A damage marker is placed on any wall that border the target space.  Remove any door markers that border the target space.

For the second explosion the players roll both dice to determine the target space.  If the Target space is already on fire, roll again.  Place a fire and spot marker and resolve an explosion in the target space.

For the third explosion, flip over to show the opposite face on the black die from the previous roll and re-roll the red die to determine the target space.  If the target space is already on fire, roll the red die again.  Place a fire and hot spot on the target space and resolve an explosion.

Now, roll to place the hazmat markers.  If the target space has a fire marker already, re-roll.  Place the hazmat on the target space.

Remove two of the victim markers and one false alarm marker and put them back into the box.  Flip all the other markers so the question mark is showing and shuffle them.  Roll the dice three times, and place one POI (Point of Interest) marker on the target space.  If the space is on fire re-roll.


Next, each player chooses a specialist card, a fire fighter pawn, and the corresponding card in the color of their choice.  If you wish, a player may play more than one fire fighter.  The remaining fire fighter pawns, cards, and specialist cards are placed back in the box.  The Specialist cards may be used during the game.  Don't put them too far away.

If needed roll to place additional hot spots.  As always, if the target space already has a hot spot, re-roll.  You will need to add three additional hot spots if playing at the Veteran or Heroic difficulty level, two additional if playing with three fire fighters, and three additional if playing with four or more fire fighters.

Place six, or twelve at the heroic level, hot spot markers on the board (small yellow circles) for later use.  The rest are put back into the box.

All the remaining tokens and damage markers are placed near the board.  Each fire fighter is placed on the board on any of the boards spaces outside the building.  The group decides where to place the ambulance and fire truck and players decide who goes first.

Playing the Game

From the start player, play proceeds clockwise around the table.   On your turn you must do three things

  1. Take an Action:
  2. Advance the Fire: 
  3. Replenish POI makers

1.  Take an Action

Each turn a player receives four action points (AP).  Each action has an action cost needed to perform.  A player may select from any of the available actions in any order and spend the appropriate AP to perform it.  An action may be performed more than once per turn, so long as the AP cost is spent each time that action in performed.


Player may pass.  Unspent AP are saved from turn to turn.  A player may save up to a maximum of 4 AP at the end of their turn.

The player takes an action marker for each unspent AP.  These may be spent later as additional AP to perform.

Actions

Move - move the fire fighter to an adjacent space.  This costs one to move to a space without a fire, two to move to a space with a fire, and two to carry a victim to an open space or space with smoke.  A fire fighter may not carry a victim into a space with fire or end their turn in a space with fire.  A fire fighter may move through a destroyed wall. When a fire fighter moves into a space with a POI, the POI is flipped to reveal either a victim or a false alarm.

The false alarm is removed and put back into the box.  This does not cost any AP.


Open / Close Door - A player may flip the door marker for 1 AP.

 Extinguish - A fire fighter may fight a fire in their space or an adjacent space.  To remove a smoke maker from the board they must spend 1 AP.  To flip a fire maker to smoke it also costs 1 AP.  To remove a fire maker from the board it costs 2 AP. Smoke may reignite so it may be good to completely remove it.


Chop - With your axe you may demolish wall quickly to reach victims or create an escape route.  For 2 AP place a damage marker on a wall segment in your space.  When the wall has two damage markers it is destroyed and fire fighters as well as fire may pass through it.  So, be careful using chop.  When there are no damage markers left the building collapses, killing everyone still in it, and making players lose the game.


Vehicle Actions - Vehicles are used only in the experienced game.  They may be driven by the fire fighters but only to their respective spots.  They give additional action that can be preformed when they are located in one of the vehicle spaces.  Each vehicle occupies two spaces.  In the experienced game victims must be carried to the Ambulance to be rescued.

Drive:  It costs 2 AP to drive.  Fire fighters can only drive the engine when in the same space as the engine.  Using their radios, a fire fighter can make the Ambulance drive without being in the same space.  The fire fighter that drives the engine must go with the engine.  It is optional to go with the Ambulance.


Vehicles can be driven in either direction around the building.  Vehicles must always start and stop in their respective parking spot.  Driving a vehicle to the parking spot on the opposite side of the building takes to drive actions, or 4 AP.

Fire fighters that are in the vehicle parking spot of a vehicle while it is being driven can ride the vehicle for 0 AP.  Riding is optional and any

Fire the Deck Gun: This action allows players to use the engines hose to extinguish the fire quickly.  It cost 4 AP to use the deck gun.  The deck gun is aimed at one quadrant of the board.  Quadrants are delineated by the dotted red lines on the board.

Fire fighters can only fire deck gun when it the same space as the engine; it can only be fired at the quadrant that borders the engine's current parking spot; and it can only be fired a quadrant with no fire fighter present.


The player rolls the dice to determine the deck gun's target space.  Because the full range of the dice rolls are not in the target quadrant, the numbers on the dice may not be in the quadrant you aimed at.  Flip over the dice that are out of range (to show the opposite space) to determine the deck guns target for any roll.  The deck gun extinguishes all smoke and fire in the target space and splashes over into each adjacent space completely extinguishing any fire or smoke. 


Splash over can extend beyond the quadrant boundary and has no effect on fire fighters, POI, victims, or hazmat.  Wall prevent splash over from reaching an adjacent space.

Crew Change - For 2 AP players may change specialists while in the heat of the action.  Players may swap their existing specialist card with any specialist not currently in play.  The player's fire fighter has the AP (less than 2 AP required for a crew change) and special abilities of the newly selected specialist for the entire turn.  Fire fighters must start their turn in the same space as the engine to complete the Crew Change action.  The Crew Change action must be completed as a player's first action of their turn. I'll talk more about the different specialists later.


2.  Advance Fire

After Taking actions the current player must roll the dice to Advance the fire.  They will place a smoke marker on the board in the target space corresponding to the numbers rolled on the dice.  Sometimes placing the smoke has a greater impact.  After you place the smoke marker, check to see if any of the following situations are created.


  • If smoke is placed on an existing smoke - flip the smoke to fire and remove the other smoke marker from the board.  Remember:  smoke plus smoke equals fire.
  • If the smoke is placed adjacent to fire - Flip the smoke to fire.  Remember: smoke adjacent to fire equal fire
  • If the smoke is placed on and existing fire - You have just caused an explosion!  Resolve the explosion.


Explosions:

When the fire advances into a space that is already on fire, an explosion occurs.  Explosions spread fire quickly, knock down fire fighters, and kill victims.

As with set-up, explosion radiate in all four cardinal directions from the target space.  Place a fire marker in each adjacent space without fire, slip the smoke marker to fire in a smoke filled space (even outside the building), place a damage marker on wall, and remove any door markers that border the target space.

If the adjacent spaces in any directions are on fire, a shockwave occurs.  The shockwave continues to travel in its respective direction passing through all the spaces that are on fire until it either encounters an open space, smoke filled space, or wall or closed door.

What happens with a shockwave depends on what it hits first.

  • Open space (without smoke or fire) - place a fire marker in the open space, even if it is outside
  • Smoke filled space - flip the smoke to fire
  • Wall - place a damage marker on the wall,  remember a wall that already has a damage marker is destroyed and will not stop a shockwave
  • Closed door - remove the door marker; it has been destroyed.  A doorway with no door marker is treated as a destroyed wall (don't place damage markers)
A shockwave travels through destroyed walls and open doors.  If a shockwave travels though an open door, remove the door maker.

Secondary Effects

Now that the fire has advanced and explosions have been resolved it is time to check for any secondary effects that might occur.

Flashover - flip any smoke marker in a space adjacent to a fire marker to fire.  Repeat this as many times as you can.  There should be no smoke adjacent to fire. 

Any victims in the same space as fire are lost.  Place the POI or Victim marker on the Lost space at the edge of the board.  If the POI was not identified flip it over (at least point you are hoeing it wasn't a victim) and place it in the Lost space.

Any firefighter in a space with fire is Knocked Down.  When a firefighter is knocked down they are placed in one of the two spaces of the Ambulance's current position.  Any victims they were carrying are lost.

Remove any fire markers that were placed outside of the building.

The Advanced game adds two more possible effects:  Hazmat and Hot Spots.

Hazmat - Hazmats are improperly stored flammable materials that are liable to cause an explosion.  After checking for and resolving flashovers, any Hazmat in a space with fire causes and expulsion in that space.  Multiple explosions can be triggered by different hazmats in the same phase, if this happens the players can choose which explosion to resolve first.  Remove the hazmat marker and add a Hot Spot marker in the space of the exploded Hazmat.


Hazmats can be carried for the same costs, and with the same restrictions, as a victim.  Hazmats can be disposed of by carrying it outside the building.  Disposed hazmats are removed from play and placed in the Rescued spot of the board.  
 
Hazmats have certainly made my games interesting.  During the Advance Fire stage of my first turn one game, I caused the explosion of three hazmats which killed two victims and nearly made the house collapse.  It was quite remarkable!  

Hot Spots & Flare Ups - Real fires get harder to fight the longer they are burning - the building heats up and combustible materials are brought closer and closer to their flash points.  Hot spots and flare ups are used to simulate this progression. 

When the target space of the advance fire roll contains a hot spot you have triggered a flare up, which are an additional advance fire roll.  These spread the fire more rapidly.

There is no limit to the number of flare ups that can occur on a single.Keep rolling the dice every time the advance fire roll target space has a hot spot.

Flare-ups also increase the number of hot spots.  After resolving all flare-ups, add a hot spot marker to the target space of the last Advance Fire roll.

Order of Resolution

In the experienced game the Advance Fire phase has a number of different steps.  The order in which the steps should be completed is:


1.  Roll for and resolve Advance Fire
2.  Resolve any explosions if needed
3.  Resolve any flashovers if needed
4.  Resolve any hazmats explosions if needed (add hot spot marker to hazmat space)
5.  Resolve any flare-ups if needed
6.  Resolve any knock downs, Lost POI or victims


Replenish POI


In the experienced game a POI may only be placed in a space without threat marker, firefighter, or another POI.


If the POI replenishment target space in invalid, the use the diagram across on the board to redirect the POI.  Begin with the target space and follow the path created by the arrows as shown until you reach a valid space.  If there are no valid spaces on the path, re-roll.


Game End

The game ends when the building collapses, the player have won (7 victims rescued) or the players have been defeated (4+ victims lost). 

Building Collapse - The game ends immediately as the building collapses when tall 24 damage markers have been placed on the board.  Place any remaining victims and POI (inside or outside of the building) on the lost space on the board.

Victory - The players are victorious when seven victims have been rescued.  If you would like, you can continue to play to see if you can rescue all ten victims for a perfect game.

Defeat - The players are defeated when four or more victims have been lost. 


Specialists


Firefighters with special abilities are introduced in the experienced game.  Each specialists has unique abilities that are useful during certain situations and beneficial to team play.

Players may choose a Specialist or select one randomly during the game.  I think its wise to work together even when choosing the specialist to build the best team possible.


 Paramedic:  The paramedic receives 4 AP per turn but can treat a victim for 1 AP.  The heal marker is placed under the victim to show this.  A treated victim may be moved by any firefigther without having to carry them.  A firefighter can lead one treated victim at a time.  They may carry a victim and lead a treated victim at the normal movement cost to carry a victim (2 AP).  A treated victim may still not be moved into a fire space.  The paramedic does pay double AP to extinguish a fire. 

Rescue Specialist:  The rescue specialist has 4 AP per turn plus 3 free movement AP per turn.  Chop costs 1 AP.  She pays double AP costs to extinguish fire and / or smoke.

Imaging Technician: Receives 4 AP per turn, and can identify, or flip a POI marker anywhere on the board for 1 AP.

CAFS Firefighther:  Receives 3 AP plus 3 free extinguish AP per turn.  (Free extinguish can not be saved). 

Generalists:  Recieves 5 AP but has no other special abilities or actions.


Driver / Operator:  Receives 4 AP per turn.  It only cost 2AP to fire the deck gun and when firing the gun he may re-roll one or both dice.  After re-rolling one die, he may then choose to re-roll the other, but is limited to a single re-roll for each.  The second roll always replaces the first. 

Fire Captain:  Receives 4 AP plus two free Command AP per turn.

He may use their AP to command any other firefighter to Move / or Open / Close doors, carry hazmats, or move with treated victims on the Fire Captains turn.  The Fire Captain spends AP at the cost of the commanded firefighter would normally have paid for the movement.  Free command may not be saved and no more than one command AP may be spent on the CAFS firefighter. 

Hazmat Technician - Receives 4 AP per turn.  They may dispose or remove a hazmat from the firefighters space and space it in the rescue spot for 2 AP. 


My Thoughts

Playing co-operative games isn't always relaxing for me.  I fear making a mistake, doing the wrong actions, or losing the game for the other players.  This game compelled me when I first saw it on Kickstarter. But, I stayed away; knowing that I really didn't need another co-op that would rarely get played.

But the buzz and the draw wouldn't go away.  I kept hearing about it; about the fire trucks, and ambulances, and cool roles.  After all the positive praise I decided to give it a try.  I wasn't disappointed.  I actually found a co-op game that I will play anytime!


The first thing that gets me is the theme.  Fire fighters are true life heroes that sacrifice to save others.  You take on their role and work as a team to rescue people and pets.  What a wonderful theme.  I like fighting dragons, and running a vegetable stand, in other games, but this theme could to appeal to so many people. 


It is also a wonderful for families with older children.  (Younger children may not like knowing the victims are killed).  Even new gamers might be willing to give it a try because of the theme.

I also like the scale of the game.  You are concentrating on one home during the game, not the neighborhood or an entire office building.  Most games I play concentrate on whole worlds, large maps, or an entire battlefield.  Focusing your attention on such a small scale is a bit novel, for me.  The board isn't small but the scale lets you center your concentration. People who might be intimidated large scale boards may find Flash Point much more inviting.

More positives for the game are the roles and special abilities.  The games I have played have shown me the importance of a well balanced team.  Using both the paramedic and Rescue Specialist during a two person games isn't quite a good idea.  But combine the Fire Captain and Rescue Specialist or really any other role in a two player game and you have a strong team.  Okay maybe you may not want to use the imagining technician in a two player game. 

But, the great thing is that you can switch roles.  You aren't stuck with a specialist who is no longer as useful.  Yes, it costs AP, but sometimes it's worth it.  So don't be afraid of taking that risk.  I also like using the Fire Truck, though I haven't been the one to roll for the deck gun, I think it's awesome that it was included.  It's also meant the difference between a win and a loss in a few of our games.


One of the reasons I think I really enjoy this co-op is a reason some people really don't like the game.  I really like the randomness.  I think it takes some of the pressure off of me making a mistake.  Rolling for the smoke and POI placement makes the game more interesting and less overbearing than other co-op games for me. 


The dice decide and, yes I could have made a better choice of where to be or what fire to put out; but not being able to plan out every last move makes a more enjoyable game.  I also think it keeps some people from overtaking the game and ordering other around.  It's random, you can guess what may happen but you never know for sure until you roll the dice.

In general, I think Flash Point has changed my opinions of co-op games.  I really do enjoy the strategy discussions and the team work that happens in the game.  It's great for bonding with friends and family.  Playing Flash Point just makes me feel good inside.  To me, that is the marking of a great game.  


Quick Stats

Designer:  Kevin Lanzing
Artist:  Luis Francisco, George Patsouras
Publishers: 999 Games, Indie Boards and Cards

Number of Players: 1-6
Game Length: 45 minutes

Saturday, April 28, 2012

Five Minute Saturday: Community

It's Saturday again, which means I join The Gypsy Mama's "Five Minute Friday" topic. Yes I know the title says Friday but I'm doing it on Saturday.   Each Friday (Saturday), we write for five minutes on a topic without any editing or rewriting allowed. I put a little spin on it and relate it to board games. 

This week is a topic I can get into Community!

So I think I'm ready, I've got my stopwatch out and I'm ready to on your mark, set, and go!


I'm part of a lot of communities, I guess you could say that I wear a lot of different hats.  I'm a proud member of each community.  Lately I've been very focused on my coaching and teaching.  It makes for a long day but its worth it.  As my friend, mentor and fellow coach told me:  it doesn't matter how tired you are at the end of the day when you get out on that track and work with those kids that is all your focused on, nothing else matters.  Its been a tough season of joy, heart ache, worry and victory.  We may be small, but we are mighty inside.  Of course I have the most amazing team and coaches. 


So that explains that I haven't fallen off the face of the earth...I've just run there.  The board game community is amazing and I'm proud and humbled at the same time to be part of it.  Since I've started this blog and reviewing I feel like I am contributing a small piece to this amazing segment of society.  I have even had a few opportunities come about from my few reviews.  I really enjoy doing this, I've just had to cut back on something, and its been writing reviews.  I'll be back soon, believe it or not track season is almost over and soon another school year will come to an end.  I excited about this summer and the possibility.  There may even be a trip to GenCon this year, since Origins isn't going to happen. 


I look forward to writing more reviews, getting feedback, and just being part a worldwide community. 


Monday, April 9, 2012

Dragonheart

The Great Dragon has been turned to stone by an evil wizard.  The dragons fire is locked away in the ruby Dragonheart.  Trolls and fire dragons threaten the city as the Great Dragon sleeps.  Huntress and Knights try desperately to keep these predators at bay. 

A player becomes either a disciple of the Great Dragon, vying to free him from his stony prison,  or a minion of the evil wizard, ensuring the dragon sleeps forever. 


Object of the Game

In this two player game one player is the a disciple of the Great Dragon and the other a minion of the evil wizard.

The disciple is trying to break the wizards spell and free the dragon.  The minion is trying to prevent the freeing of the dragon.  To accomplish these goals, the two players take turns placing cards on the board in order to collect cards for their score piles.  Each of the cards are worth one to four points, and at the end of the game, the player with the most points succeeds at his goal and wins the game.


Components

The components for "Dragonheart" are of great quality (as we would expect of a Fantasy Flight Game).  The plastic Great Dragon Figure really serves no purpose, but is still a great piece. 

I really like the artwork for this game as well.  The game board is a nice thick cardboard.  The board is placed in the center of the gable and the Great Dragon figure is placed to the right of the petrified dragon space, above the dwarf space. 

Each player now chooses which deck to take, the red or the green.  Both decks are exactly the same, except for the color on the back.  These decks are shuffled and the players each draw five cards for their starting hand.  The remaining cards form the draw deck.  These are placed face-down in front of the player.

The youngest player chooses who plays first and that person starts the game.


Game Play

Players will alternate their turns.  Each turn consists of three steps: play cards, collect cards, and draw cards.  The active player will complete all three steps before the second player takes their turn. 

Step 1: Play Cards: During this step the player will play one or more cards face-up to the game board.  The cards played must have the same picture and that picture must correspond to the picture on the game board.  For example all the cards played must be Sorceress and be placed on the Sorceress space.  The player must also reveal the point values of the cards as they are played. The player does not need to play every card that he has with the same picture but at least one card must be played during this step.

Some spaces on the board have a single outline while others have multiple card outlines.  The number of outlines indicates how many cards are needed to activate the space's effect.  Space effects give the activating player the ability to take cards and place them in their score pile.  No matter how many card are added, the effect only activates once per turn.  Not every space has an effect. 
On spaces with only one card outline, any number of cards may be placed.  There is no limit.  Cards are placed in a stack with only the top card visible.  Players may not look at cards below the top card. 

Spaces with multiple outlines can only hold as many cards as there are outlines.  Cards placed in these spots are placed in a slightly offset stack.  All cards are at least partially visible. 

Step 2:  Collect Cards:  If possible, the player now collects cards from the game board.  If a player has activated a space effect during the Play Cards step that allows him to collect cards, he may do so.  These cards are placed into the players score pile.  The score pile cards may be examined by the player at any time.  
When a player activates a space and there are no cards for the player to collect, the player does not get to take any cards.  Also, when necessary, the Huntress, Knight, and Ship cards are removed from the board during this step, as well. 

Step 3: Draw Cards:  During the third step the player draws cards from their draw pile to refill their hand up to its maximum size (usually five).  After this it his the opponents turn to begin. 

Space Effects

The board uses arrows to help remind players of which spaces effect each other. 

Treasure Chest:  This is where the wealth of the dwarfs accumulates.  It lures fire dragons and sorceresses.  

Playing cards to the treasure chest does not trigger an effect. 

Fire Dragon:  Playing cards to the Fire Dragon space allows the player to take all the cards on the Treasure Chest space (as indicated by the arrow on the board).   The Fire Dragons carry off the dwarfs treasure at the direction of the evil wizard.


Petrified Dragon:  Cards played here do not trigger an effect.  The Petrified Dragon sits silently in accusations against those who imprisoned him.  The Dragonheart flickers with life, until the day when the spell can be broken.

Sorceress:  The Sorceresses know what they want: great wealth and the magic of the Dragonheart for themselves.  They work their craft on the Petrified Dragon to unlock the secret of its powers.  Playing cards to the Sorceress allows the player to take all the treasure chest cards or al of the cards on the Petrified Dragon space.   Regardless of how many sorceress cards are player, the player may only take the cards from one of those two spaces.


If the player takes at least one Petrified Dragon card, they also take the Great Dragon figure and places in front of them.  Now the player has a hand size of six cards.  If the Great Dragon was taken from an opponent the opponent must reduce their hand size to five cards.  The new owner of the great dragon takes a random card from their opponents hand and places it on top of the opponents draw deck. 


Troll:  The evil wizard has sent trolls after the Sorceress because of their meddling, yet they only threaten the powerful Sorceress.  When a card is played to the troll space it allows the player to take all the cards on the Sorceress space. 


Dwarf:  Driven by the search and not the wealth the Dwarfs seek treasure.  Once they have uncovered enough, they display their discoveries on the highest mountain top to sparkle in the sun.  When four Dwarfs meet they tell tales of their finds while they are deep in their cups.  The player who plays the fourth card to the Dwarf space takes all four cards on the space. 

Knight:  Where there is a monster there is a knight to fight it.  Mostly the knights fight trolls, if there are no trolls they carry the sorceresses to safety (whether the sorceresses wants them to or not.)  When a player places the second knight card on the space they may takes all the Sorceress cards or all the troll cards.  The player may only take cards from one of the spaces. Next, the knight cards are placed face-up in the stack below the ship space.


Huntress:  Brave Huntress stalk the fire dragons sent by the evil wizard.  The player who plays the third card to the Huntress space takes all the cards on the Fire Dragon space.  Next, the Huntress cards are placed face-up below the ships space. 

Ship:  Distant lands and new adventures call the Knights and Huntress.  Once their work in this land is done, they board their ships and when the time is right, set sail for distant lands.  The player who plays the third card to the Ship space takes all the cards below the ship space (Knights / Huntress).  Next, the three ship cards are placed in a face-up stack next to the game board.  The second time three ship cards are on the board, they are placed next to the first stack.  The third time three ship cards are placed it is the end of the game.

End of the Game

Once the third stack of ship cards are placed next to the game board the ending of the game is signalled.  After the player who placed the third stack has ended his turn, the opponent takes one final turn.

The game can also end before the third stack of Ship cards are placed if one player is unable to draw any cards from their draw deck.  The turn in which the player has no cards to draw is their final turn.  The opponent may take one final turn.

Once the final turn of the game is over, the players return the remaining cards in their hands to the box.  These cards have no value.  Then, each player totals the point values of the cards in their score pile.  The player who possesses the Great Dragon figure scores three more points.

The player with the highest point total wins, freeing or keeping the Great Dragon petrified, depending his they were the green or red player.  In case of a tie the player with the Great Dragon figure wins.


My Thoughts

Dragonheart was a surprise hit for and my husband and me.  Last Thanksgiving, we bought this game from the Fantasy Flight Holiday sale and didn't expect too much.  Once played, we realized we had a light, beautiful and enjoyable two player game that makes a great filler, week night game, and gateway game.

A card game usually equals a lot of luck and that is certainly true in this game.  You may be forced to make a move you really don't want to make because of your hand.  This was true for me a few times.  Sometimes you choose the best of the worst and sometimes you just get lucky.  For example putting down a five treasure card you can't get next turn or laying down one fire dragon and taking 15 points of treasure.  The choices you make are certainly meaningful but at the same time not deep enough to leave one stuck in analysis paralysis.  Also don't underestimate the Dragonheart, a six card can certainly prove its worth.

Players also need to keep track of what their opponent is doing and possibly how many points they have.  During one game, my husband thought I was way ahead of him, and tried to end the game early before I could get even more cards and defeat him even worse.  I certainly had more score cards but they were mostly one's and two's.  As a result his smaller yet larger numbered pile won by almost twenty points.


Had I been paying attention better I may have been able to change my tactics, gone after the higher point cards, and tried to keep the game going longer.

In my opinion this would be a great couple's game.  I certainly enjoy battling this one out, with my husband.  The easy rules, beautiful artwork, and quick game play lend themselves towards this end.  And, because the game is quick to play it's easy to get a few plays in; best three out of five maybe?

Quick Stats:

Designer:  RĂ¼diger Dorn
Artist:  Michael Menzel 
Publishers: Fantasy Flight Games, Kosmos, Filosofia Edition, Galakta, Giochi Uniti, MINDOK, Smart Ltd, Stupor Mundi

Number of Players: 2
Game Length: 30 minutes

Thursday, March 29, 2012

Lords of Scotland

Have you ever played the White Elephant Gift Exchange Game?   Every time, without fail, there is always one or two gifts that everyone is fighting.  It's usually because they come in pretty packaging and bows.  Hilariousness ensues as people steal that same gift, over and over, making one sigh as they lose their prize yet again.  The whole time you know that your horribly wrapped gift, will be the one sought after when the gifts are finally opened.  "Lords of Scotland" is a lot like that poorly wrapped gift.  While everyone is fighting over the new hotness, this little diamond in the rough is given no attention. When everyone sees its full potential it will be the game to own.
Goal of the Game

Players are trying to be first to acquire forty strength worth of supporters and claim the throne.  They do this by winning skirmishes against their rivals.

Components

"Lords of Scotland" comes with 98 clan cards, 1 Initiative Card, and one Rules Sheet. Each card contains the following information:  the cards strength, bloodline, rank, and power.  

Rank:  Each card represents a clan of Scotland.  Its unique rank is found in the upper right corner of the card (lower corner for Clan Makgill).  This rank is used to break ties.  The Clan MacDonnell card is rank 3, while the Clan Makgill card is rank 2.

Bloodline:  Each clan belongs to one of the eight normal bloodlines or to the royal Bruce bloodline.  The name of a clan's bloodline, the portrait of its chief, its clan tartan, badge and color are displayed on each card.

During the game, armies composed of two or more clan from the same bloodline fight at double strength.

Strength:  A clan's strength is listed in the upper left hand corner of the card. (Both clan cards above are strength 1.)  At the end of each skirmish, the army with the highest total strength wins the right to claim the first supporter.  During the skirmish, strength determines whether or not you can activate the clan's power.  A clan's strength value also represents its value when claimed as a supporter. 

Power:  There are nine different powers in the game corresponding to the eight normal bloodlines and the royal Bruce bloodline.  When you play a clan from your hand, and there is no clan already in the skirmish area, with a lower strength, you may activate the clan's special power.  For example, Clan McDonnell cards are not discarded and Clan Makgill cards allow the player to muster another clan.

When a clan is played face-up, their clan power may be activated.   Most effects happen immediately and require you to make a choice after you play the clam.  Some powers, on the other hand, only take effect at the end of a skirmish.  Once activated, these powers take effect even if another clan with a lower strength than yours if played afterwards.  However, the effect will only occur for you, if you control the clan at the end of the skirmish, and if the clan remains in play.  If, unfortunately, your clan belongs to another lord's army at the end of the skirmish, then its effect will occur for that lord instead.  Clans which are played face-down do not activate powers.

List of Clan Powers

Discard another clan:  discard one other clan in the skirmish
Swap with a Supporter:  switch this clan with one of the clans in the supporter pile
Swap with another Clan: switch this clan with another clan in the skirmish
Draw a Card: allows players to draw from the draw pile
Do not discard this Clan:  allows players to not discard the card at the end of the skirmish
Muster another Clan:  muster an additional clan immediately after this clan
Copy another Power:  copy the power of any face-up clan in this skirmish
Join each Bloodline:  This clan counts as the same bloodline as all other clans
Claim Two Supporters:  If you control this clan at the end of the skirmish, claim two clans in the supporter pile instead of one.  This power is not cumulative


Set-up

The oldest player is given the Victor's Initiative card. Shuffle the cards and deal each player five cards.  A draw pile is created with the remaining cards.

The top five cards from the draw pile are placed face down, side by side, to the right of the draw pile.  These cards are now the "Recruit Pile."


Cards equal to the number of players (2 for 2 players, 3 for 3 players) are placed face-up, side by side, horizontally, to the left of the draw pile.  These cards are now the "Supporter Pile."  If two supporters of the same number are put out discard both and draw again.

Space is needed for a discard pile next to the draw pile.  The lord with the Victor's Initiative goes first.


Game Play

Players gain support by winning skirmishes against their opponents.  A skirmish is five consecutive rounds of play.  During each skirmish, a player may either build up their army by playing cards from their hand or recruit clans to fight by drawing cards from the recruit pile.  At the end of five rounds, each lord gets to claim a supporter in order of highest strength army to lowest.  All mustered clans are discarded and a new skirmish is begun.

The player with the Victor's Initiative card goes first.  They first turn over one face-down card, in the recruit pile, before they take their action.

Recruit a Clan:  If a player has fewer than ten cards in hand, they may recruit a clan member.  The player may draw any card from the recruit pile.  If the card was face-up a replacement card is placed face-up as well.  If the card was face-down the replacement is placed face-down.

Muster a Clan:  A player may play a card to their area face-up or face-down to add it to their army, for the current skirmish.  If the card is placed face-up and there is no lower strength card than that card, the player may immediately activate the power described on the card.


After the player has recruited or mustered a clan and / or activated its power their turn is over and it is the next lord, in clock-wise order, turn.


The End of a Skirmish

At the end of each skirmish, flip over all face-down clans in the skirmish and total up the strength of all clans in each lord's army.  Double the total of any army, if the army contains more than one clan, and all clans in the army are from the same bloodline.  If your army has the highest total strength, you win the skirmish.

Collect one of the clans in the supporter pile, and set that card aside in your victory pile to keep track of how many points you have.  Then, in the order of the second highest value army to the lowest value army, each other lord claims a supporter and places it aside in their victory pile.


If there is ever a tie between two or more lords, the lord who controls the highest ranking clan in the skirmish wins the tie.  Once all clans in the supporter pile have been claimed, discard all the cards in the recruit pile and the cards which were mustered into the skirmish.  Then, replace the cards in both the supporter and recruit piles with new cards from the draw pile.


These will be arranged as they were at the beginning of the game.  If the draw pile runs out, reshuffle the discard pile.  The lord who won the skirmish is given the Victor's Initiative card and takes the first turn in the next skirmish.

The End of the Game

Continue taking turns and completing skirmishes until someone accumulates forty or more strength worth of supporters.  At that point, the lord with the most strength of support wins.  If two are more lords are tied, then the lord who placed higher in the final skirmish wins. 


My Thoughts

I admit, I'm guilty.  This game sat on my shelf for months because I could not get past the artwork.  When it finally got to the table I sat there, shaking my head, asking myself why I didn't play it sooner.  This is an amazingly fun, light, quick game.  There is a lot packed in to it.  With better graphics and "Lords of Scotland" would be a lot more must have lists.

Being a card game there is going to be a lot of luck involved.  There is also a lot of strategy and tension.  Since players can place cards face-up and face-down decisions can become quite a gamble.  Do you muster your best clans or put out a lower card so you can use its power or block opponents' powers?  Could your opponent have all one clan with those face down cards?

You can watch what clans your opponents recruits and try to guess their strategy but it isn't easy to determine.  At the same time you have to balance recruitment to make sure you don't run out of clans and get the clans that would work with your own strategy. 

Supporters also play a role in the strategy.  Sometimes numbers are close together and sometimes one card is much higher.  It seems like our supporters are always one of two numbers off of each other.  When supporter numbers are low or close players may not risk using their best cards or they may bluff and try to ensure a victory that skirmish. 

"Lords of Scotland" was a surprise game from me.  I was not expecting it, but I have found a wonderful little card game that I would highly recommend.  Game play is smooth, fast paced and captivating.  The rules are well written and easy to learn.  The quality is wonderful (love the linen-finish cards) if the artwork isn't.  If "Lords of Scotland" came out with another theme or different art I would definitely be per-ordering.


Quick Stats:

Designer:  Richard James
Artist:  Gabrielle Levion
Publisher: Evertide Games, Z-Mann Games
Number of Players: 2-5
Game Length:  35 minutes